HP Deskjet 4100e Setup
The first step towards smooth printing, scanning and faxing is setting your HP DeskJet 4100e printer. A setup based on this format for whatever purpose you want to use it for, whether you use it for personal tasks and documents, will maximise performance. This guide explains each step of installing your printer, setting it up and connecting to the WiFi, and other common problems you will run into. This gives you a stable wireless connection, meaning that you can print from multiple devices and be more convenient and more efficient.
Furthermore, we will also provide some important troubleshooting tips that will guide you in addressing connectivity or hardware problems in no time. Built with HP’s smart features and mobile compatibility, the DeskJet 4100e is meant to simplify your printing. Through this guide, you will realize the potential of your printer and print high quality print without interruption. Now let us start with the setup process and hassle free printing!
How to Setup HP DeskJet 4100e
In order to simplify the process of HP DeskJet 4100e printer setup, you should easily take measures to make sure the printer has smooth and efficient printing operation. Here’s how you should follow it in order to get started:
Unbox Your Printer: Start by unboxing your printer, take out all the packaging materials that comprise protective tape as well as inserts, and remove the protective tape and inserts. Place the provided HP ink cartridges into the open ink cartridge access door, making sure they are properly and firmly in place. Next, put plain A4 or letter size paper in your input tray, to align and take an initial print.
Power On: Connect the printer to a power source with the provided power cable and choose Power On. Turn on the device by pressing the power button. Allow the printer a few moments to start.
Download and install HP Smart App: Download the HP Smart App from your smartphone, tablet or computer. It is available as a download for Windows, macOS, iOS and Android devices, and sets you up using a guided method.
Follow On-Screen Instructions: Open the HP Smart App, select Set up a new printer, and follow On-Screen Instructions. Along with including all necessary steps like loading paper, properly loading cartridges, and connecting to WiFi, it will start off by prompting you.
Read More: How to Connect HP DeskJet 2700 to WiFi
HP DeskJet 4100e WiFi Setup
With a wireless connection you can print from any device without being attached to the printer physically. Here’s how to set it up:
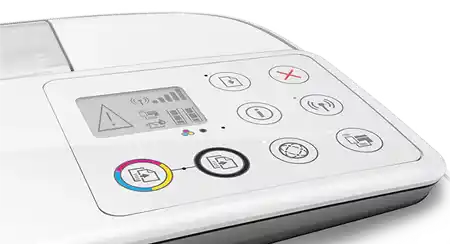
Make sure that WiFi is On: The printer’s WiFi light needs to be blinking, signifying that it is in the setup mode. If not, push and maintain the Wireless button until it begins blinking.
Use HP Smart App: For this, you need to open the HP Smart App and choose Set up a new printer. The app will look for nearby printers and automatically run.
Select Your Printer: Select Available Devices and Choose the HP DeskJet 4100e from the list of devices that are available.
Connect: If prompted, connect to your WiFi network name (SSID) from here using your WiFi password.
Complete Setup: Once the printer successfully connects, the WiFi light will turn solid, indicating a stable connection. Your printer is now ready for wireless printing from your desktop, laptop, or mobile device.
HP DeskJet 4100e Fax Setup
Businesses along with individuals depend on fax as their fundamental secure document transmission method to send documents promptly. Your HP DeskJet 4100e will handle fax communication both through reception and transmission once you establish its setup. Use this procedure to finish your fax setup process:
Connect a Phone Line: A phone connection becomes necessary for implementing fax operations when your printer is linked to a functioning landline phone system. Start by attaching a standard phone cable to the LINE port at the printer back before connecting its other end to the telephone wall outlet. Having the same phone line for both voice calls requires using a phone line splitter.
Adjust Fax Settings: After successfully connecting the phone line users should adjust fax configuration settings. You can access these settings:
- Through the Printer Control Panel: Access Printer Control Panel to reach Setup-> Fax Setup where you can modify Basic Fax Settings which include Fax Resolution and Dial Type determination with Answer Mode selection between automatic and manual.
- Using the HP Smart App:Open the HP Smart App for configuration of Fax Setup. Set up your fax operation following the displayed instructions while installing a header that includes your contact details and establishing the number of rings until a response.
Perform a test fax before relying on this method for valuable documentation.
- Test the Fax: Contact a reliable recipient by fax while requesting confirmation of their reception. The fax testing service from HP is free to all users.
- Perform these steps again to check your settings if the testing tool delivers an error message, then verify both phone line condition and proper connection status.
The HP DeskJet 4100e will be ready for fax operations after you complete the required setup steps to guarantee secure document transmissions at any time.
Read More: Connect HP Laserjet Printer to Wifi
How to Reset the WiFi on HP DeskJet 4100e
Resetting your WiFi can resolve network connectivity issues, hence, learning this process becomes handy in case you’re struck by network connectivity issues.
Press and Hold WiFi & Cancel Buttons – Access the printer’s control panel, to go to resetting mode press and hold the WiFi and Cancel button on your printer for about 5 seconds. A blinking WiFi light confirms that the printer has entered WiFi setup mode.
Note: This action will erase previously stored settings, and you will be able to connect to new network
Reconfigure WiFi Settings – After resetting, you need to reconnect the printer to your network using the HP Smart App:
- Now simply open the HP Smart App on your digital device, laptop, tablet, mobile.
- Select Set up a new printer and follow the prompts to detect your printer.
- Choose your WiFi network (SSID) and enter the WiFi password to establish a secure connection.
Verify Connection: Once the printer connects successfully, the WiFi light on the printer will turn solid, indicating a stable connection. To confirm:
- Print a Network Configuration Report from the printer menu to check the connection status.
- Try printing a test document wirelessly from your phone or computer.
Resetting the WiFi on your HP DeskJet 4100e ensures seamless connectivity, allowing you to print, scan, and fax without interruptions.
Mobile Printing with HP DeskJet 4100e
Mobile printing would enable remote convenience in printing documents and photos from the device. It includes access to the HP Smart app for printing, scanning, and managing the printer’s settings remotely. The HP DeskJet 4100e is capable of wireless printing without a computer. Just connect your mobile device to the same Wi-Fi and the printer, or use Wi-Fi direct to facilitate direct printing. No matter where the phone user is, home, or maybe somewhere, mobile printing provides transfer-free print jobs. It gives the efficient answer to modern printing contexts without being user unfriendly.
Conclusion
Setting and maintaining the HP DeskJet 4100e could not be more simple if all the right steps are followed. From unboxing and installation of the drivers to WiFi connections and enabling fax functions, everything that is essential for an absolutely smooth operation has been discussed in this guide. These instructions will ensure maximized efficiency and productivity for you whether setting up your printer for the first time or while working on troubleshooting simple problems.
Wireless connectivity has made the printing simple; print from several devices without the hassle of cables. Regular updates of your printer software and upkeep will prevent a good number of performance problems and extend the lifespan of the device. Should there be problems with connectivity errors or print quality, troubleshooting procedures like checking network settings, reinstalling drivers, or running the HP diagnostic tools will help you sort them quickly.
This extensive guide ensures that your HP DeskJet 4100e runs efficiently for your printing, scanning, and faxing needs. It can be used at home, the office, or around school, all the while ensuring reliability and high performance. Hassle-free printing is now with your HP DeskJet 4100e!
Frequently Asked Questions
Q1: How do I reset the WiFi on my HP 4100e printer?
Ans: To reset the WiFi on your HP 4100 printer start by holding WiFi and Cancel buttons together for about 5 seconds. Wait until the Power light blinks, then reconnect using the HP Smart app.
Q2: Can I connect my HP DeskJet 4100e to a 5GHz WiFi network?
Ans:Yes, HP DeskJet 4100e supports both 2.4GHz & 5 GHz WiFi networks.
Q3: Can I print from my smartphone using the HP DeskJet 4100e?
Ans: Yes, use the HP Smart app on your iOS or Android device to print wirelessly.
Q4:How do I get my HP DeskJet 4100e back online?
Ans: Try giving the printer a fresh start, reconfirm the network connection, and try using the HP print & Scan doctor utility tooll to do some troubleshooting.
