
In today’s digital world printers are very important devices in homes, schools and offices. Some of the features of Canon printers include efficiency, good quality and easy to operate among others. However, many users, especially first-timer Canon printer owners, often find themselves asking: How to connect Canon printer to laptop?
This detailed article will provide you with a step by step procedure to follow and ensure that you establish connection between the Canon Printer and a Laptop. Whether you need a cabled connection or wish to have a wireless connection, this article will provide you with all the required information. By the end, you’ll be able to effortlessly print documents from your laptop, ensuring a seamless experience.
1. How to Connect a Canon Printer to Laptop (Wired Connection)
The first method one can use to share a Canon printer with his laptop, is through the use of a cable. This is achieved by connecting your printer’s USB port with the laptop through a USB cable connection.
Step-by-Step Instructions:
Unpack and Prepare the Printer: To begin with it is important to ensure that you are having a proper unpacking of your Canon printer and all materials that cover the printer are perfectly removed. Plug the power cord and switch on the printer.
Locate the USB Cable: Search for the USB cable which is commonly used together with the printer. This will be your first port to connect the printer with the laptop and download a firmware onto it.
Connect the USB Cable to Your Laptop: Plug one end of the USB cable to the USB port of the Canon printer and plug the other end to any available USB port in your laptop.
Install Printer Drivers: As soon as the USB cable is connected, most of the time the printer will be recognized and the drivers will be installed by default. Some laptops fail to detect the printer and therefore require that drivers be installed manually.
Read More: How To Fix My Canon Printer Error
To install drivers manually:
- Go to the official web-site of Canon.
- You need to go online and look for your specific printer model and then find the newest drivers online.
- You are required to download the relevant drivers of your laptop.
Print a Test Page: After installation, open a document on your laptop and try to print it. If everything is working, your document should print without issues. By following these steps, you can easily connect your Canon printer to your laptop via a wired connection.
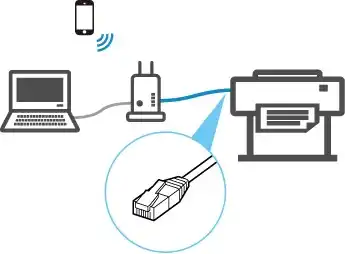
2. How to connect My Canon Printer to My Laptop Wirelessly
Wireless connections provide more mobility; it means that one is able to place their printer anywhere they wish within a certain range of their home or workplace. This is particularly useful in today’s workplaces especially where movement is critical.
Step-by-Step Instructions:
- Turn on Your Canon Printer
- Enable Wi-Fi on the Printer
- Many of the Canon printers are set in the build with a Wi-Fi button or you can find the wireless option in the settings.
- For those printer models which have LCD displays, go to Key Settings -> WLAN Setup.
- For those without a screen, if you have a Wi-Fi button, then you need to hold it until the indicator begins to blink.
- Connect the Printer to Wi-Fi: When the Wi-Fi function is turned on the printer will again scan for available networks to connect to. Choose your home or office Wi-Fi network and put in the password when it asks you for it.
- Install Printer Software: Go to the canon’s official website and install the software to allow your laptop to engage in wireless printing.
- Add the Printer to Your Laptop: Go to ‘Settings’ > ‘Connected Devices’ > ‘Printers & Scanners’.
- Click on Add a Printer or Scanner and your Canon printer should appear on the list. Click it and then other directions will appear on the screen; follow them to finish the setup process.
- Print a Test Document: Attempt to print a test document using wireless connection after adding the printer.
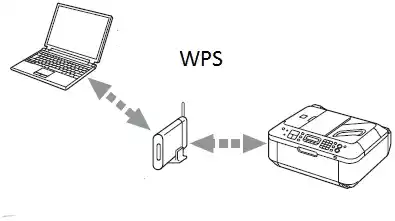
3. How to Connect My Canon Printer to My Laptop (Using WPS Method)
Wi-Fi Protected Setup (WPS) which is another efficient means if used to connect the printer to the laptop wirelessly, using the router with WPS. It can also help to automatically configure the wireless connection of a printer without the need of manually entering passwords.
Step-by-Step Instructions:
Check for WPS Button on Your Router: Make sure that your router has a WPS button – it may be labeled ‘WPS’ or ‘connect’.
Enable WPS on the Canon Printer: On your Canon printer, you have to press and hold the Wi-Fi button until the power light begins to blink. Then have the WPS button of the router pressed within two minutes.
Connect to the Network: The printer will actively find the router on its own. The Wi-Fi light on the Canon printer should turn solid, thus showing that the device has connected successfully.
Install Printer Drivers: Go to the Canon website and get the printers drivers and software for your printer make sure you download the drive specific to your model.
Add the Printer to Your Laptop: On your windows laptop open the settings app and click on the printers & scanning devices option. If you use the WPS, you should select Add a Printer and the desired printer should appear.
Print a Document: After the setup has been completed, try performing a wireless print of a document to ensure that everything is okay.
Troubleshooting Common Canon Printer Connection Issues
It is possible that even after following all the above steps, you face some problems while connecting your canon printer with the laptop and still looking to get the answer of “How can I Connect My Canon Printer to My Laptop?” Here’s how to solve the most common problems:
Printer Not Detected: If the printer is not listed please ensure that your laptop and printer are connected to the same wireless network on the printer. WLAN routers may cause internet connection problems; make sure your Wi-Fi router is in good condition or there are no problems with the signal.
Drivers Not Installed Properly: If the drivers are not installed in an automatic way, it is possible to get them in the Canon support page. From this, make sure that you are downloading the correct version for your printer model and operating system.
Slow Printing: Slow printer could be due to low signal strength on the wireless fidelity. It is advisable to take the printer nearer to the router or even plug it into the computer using the USB port for faster print.
Wi-Fi Connection Dropping: If the printer is continually disconnected from the Wi-Fi connection then you must reboot the router or printer. If that remains to be an issue, try to clear your Canon printer’s network setting then connect it again to the Wi-Fi.
Why Choose Wireless Printing?
Flexibility: You are not bound by cables meaning you can place this printer wherever you find suitable.
Mobility: Wireless, or Cloud, printing means that you do not have to be tethered to a particular printer within range and can move around while having your printouts made.
Multiple Devices: Mobile printing enables multiple users to send documents to a printer using computers, mobile devices, tablets and other devices at a go.
Clutter-Free Workspace: Wireless printing means less clutter at the works space is ideal to be used in confined spaces.
Conclusion:
It is important to understand various ways of establishing a connection between your Canon printer and the laptop in order to minimize any hurdles that may be expected. If you happen to follow the instructions pointed out in this article, then the configuration process should be rather seamless. Wireless connections have additional benefits of affording you the options of printing from anywhere. As for those who are still having problems, visit Canon’s support page where you can find more information and useful tips.
Frequently Asked Questions
How do I connect my Canon printer to my laptop using a USB cable?
To connect your Canon printer to your laptop using a USB cable, follow these steps:
1. Power on the printer and your laptop.
2. Connect the USB cable from the printer to an available USB port on your laptop.
3. If prompted, install the printer drivers automatically or download them from the Canon website.
4. Once the drivers are installed, your laptop will recognize the printer, and you can start printing.
How do I connect my Canon printer to my laptop wirelessly?
To connect your Canon printer to your laptop wirelessly:
1. Turn on the printer and enable Wi-Fi in its settings.
2. Connect the printer to your Wi-Fi network using its control panel.
3. On your laptop, install the printer software from the Canon website.
4. Add the printer through your laptop’s Printers & Scanners settings.
Do I need to install drivers to connect my Canon printer to my laptop?
Yes, you need to install drivers to connect your Canon printer to your laptop.
Can I connect multiple laptops to one Canon printer?
Yes, you can connect multiple laptops to one Canon printer.
What should I do if my Canon printer is not detected by my laptop during setup?
Ensure the printer is turned on and connected properly, check for any driver updates or reinstall them, and make sure both devices are on the same network for wireless connections.
How do I set up my Canon printer for mobile printing from my laptop?
To set up your Canon printer for mobile printing from your laptop, install the Canon printing software and drivers on your laptop, ensure both devices are connected to the same Wi-Fi network, and use Canon’s mobile printing app or software to print from your laptop.
